

Boat Building Forum
Find advice on all aspects of building your own kayak, canoe or any lightweight boats

Date: 8/24/2014, 12:04 pm
I was all set to create a carbon coaming ring using Vaclav's OneOceanKayaks method. But after seeing how good the Spanish Cedar looked under epoxy I decided to go with an all wood coaming ring. I'm following Nick's blog post on laminating a coaming ring out of thin strips with a couple of small changes.
http://www.guillemot-kayaks.com/guillemot/blog/nick/laminating_coaming_lip
I'm laminating each side one at a time so that when they're joined together there will be a small strip of basswood in the center of the coaming that matches the basswood strip running down the center of the boat.
I had bought a size 1.4 Seals spray skirt, which I'd read should roughly fit the Guillemot coaming pattern from Nick's book. I ended up adjusting the width and length a bit and making two plywood templates before I finally came up with a size that seems to fit the skirt pretty well. The final size is roughly 29 1/4" x 15 3/8".
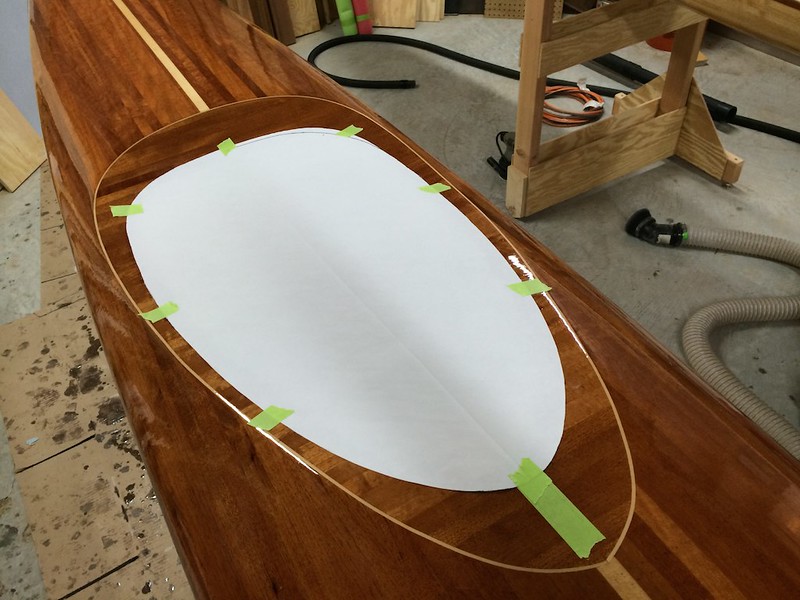
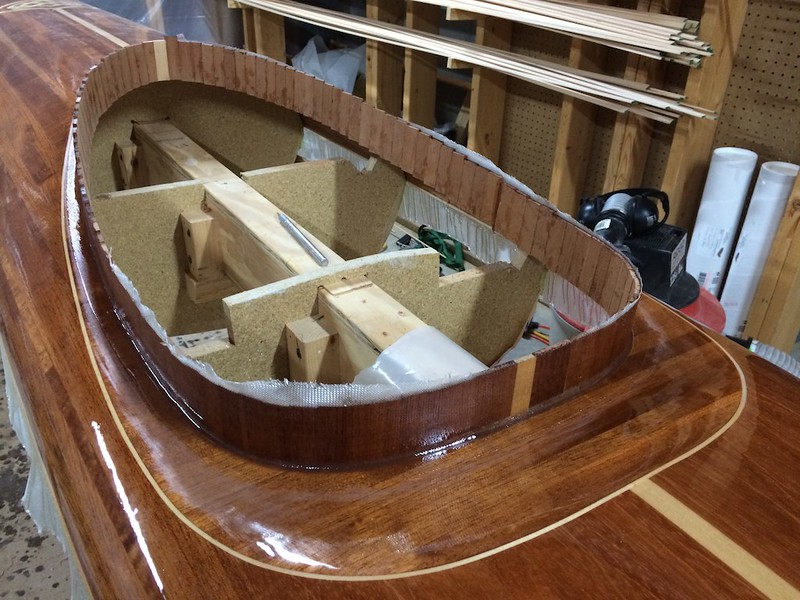
I almost didn't have enough wood in the recess to pull this off. The pattern is just touching the opening at all four corners.

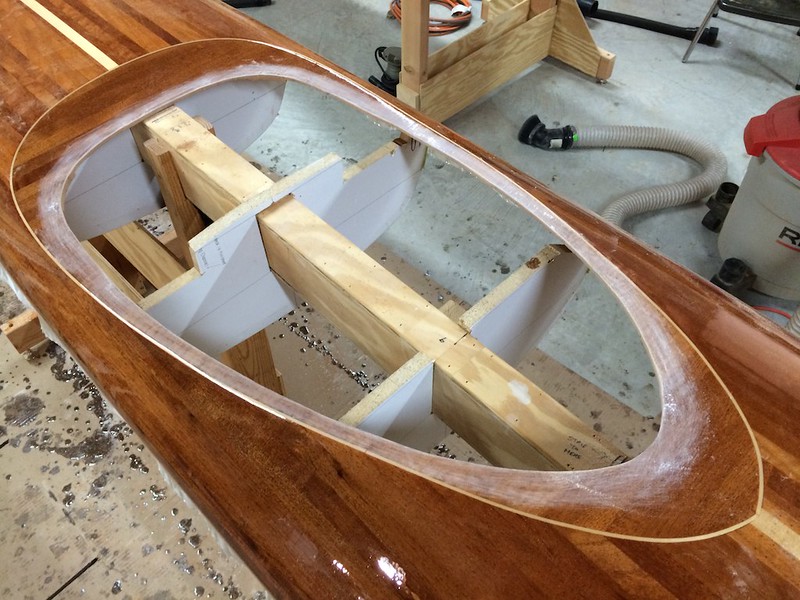
The finished opening roughed up and ready to receive the riser.
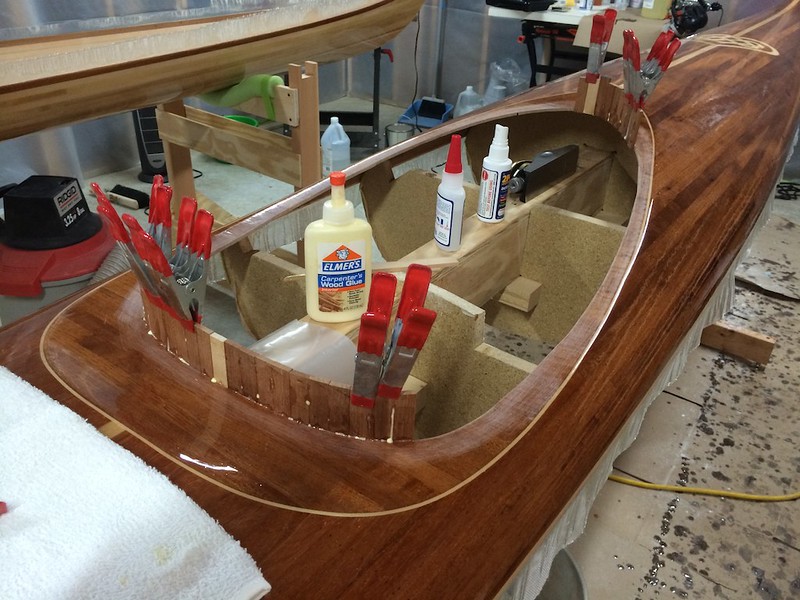
Gluing the riser in place. Regular Titebond glue between the strips and against the hull. Using CA glue and accelerant to hold them in place until the TB dries. The CA glue will be covered by a fillet of thickened epoxy.
Riser sanded with fillet in place. Taped off ready to receive glass. Fillet was a mixture of colloidal silica and Spanish Cedar sawdust.
Glassed. Ready to receive laminated strips.
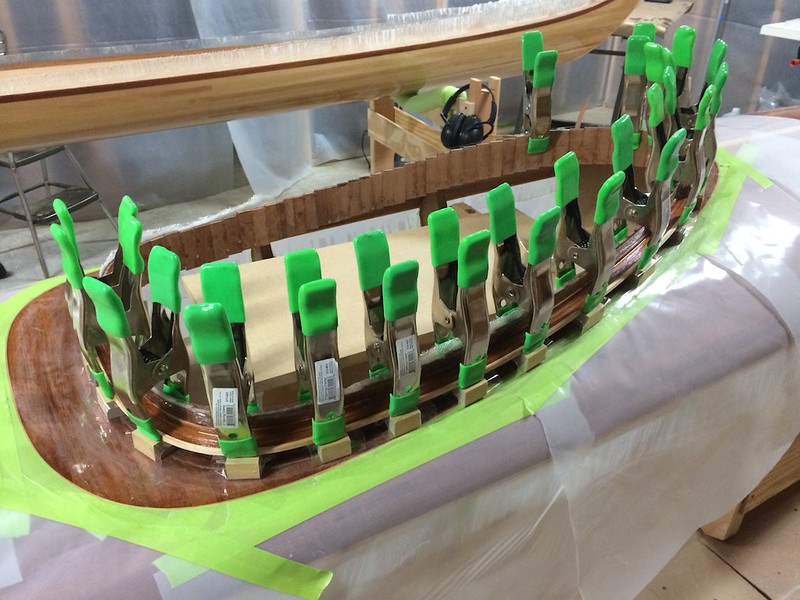
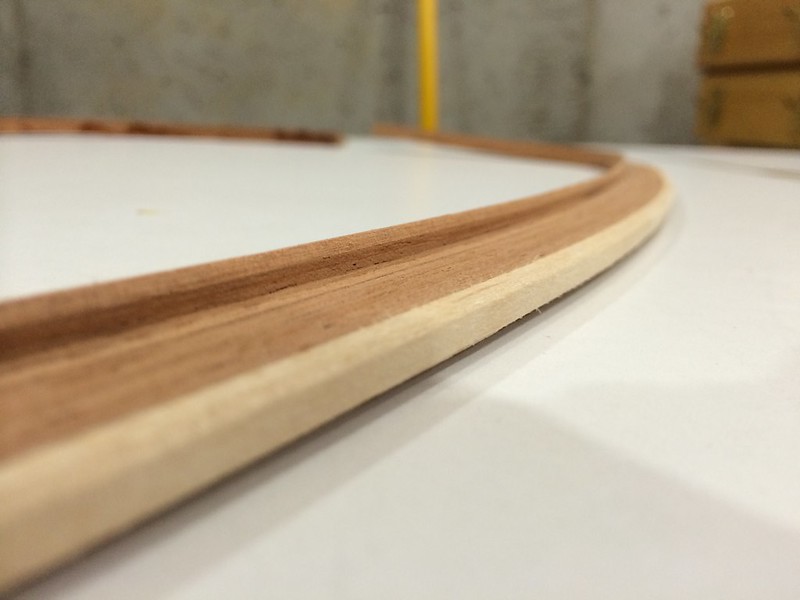
I used eleven 1/16" strips. After sanding the coaming ring will be about 5/8" wide and 5/8" off the deck. The first nine strips are Spanish Cedar and the last two accent strips are Basswood. All strips are 3/16" thick except for the first one, which was 5/8". The first strip was made up of three pieces joined with CA glue. It forms a flange that the thinner strips are glued to. The flange will be trimmed flush on top and trimmed down to roughly 3/16" below leaving a 3/8" surface to glue to the riser. The bottom of the flange will receive another fillet of thickened epoxy to strengthen the coaming ring. The entire riser is masked off with packing tape. One side is laminated at a time. The ring rests on 5/8" high blocks covered with more packing tape so that it will conform to both the curve of the cockpit recess as well as the coaming riser.
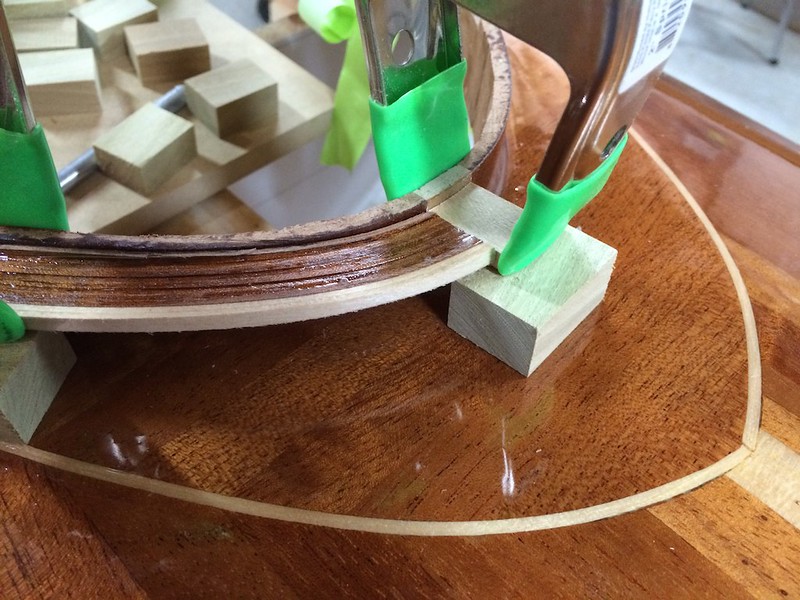
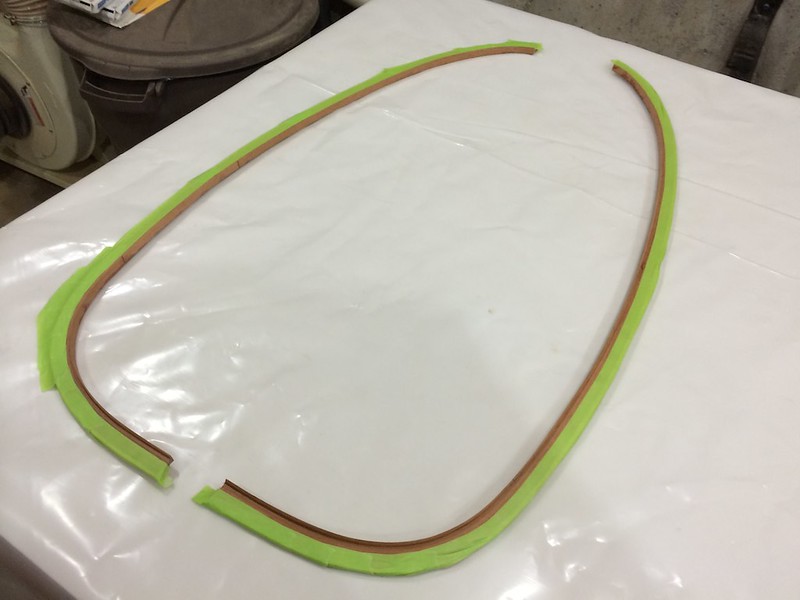
Once dry each side of the ring is trimmed to meet the small strip of basswood at both ends of the coaming. To trim this exactly I score the ring with a knife and then use the bench top disk sander to sand right up to the score mark.
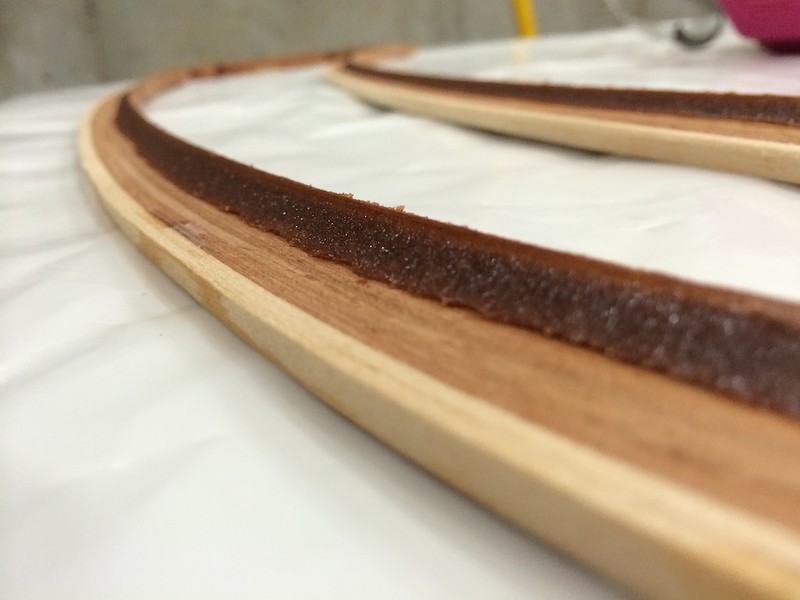
Here I've flipped the ring over and sanded the underside smooth and marked the flange with a 3/16" line. Used the low angle block plane to trim the flange done to the line.
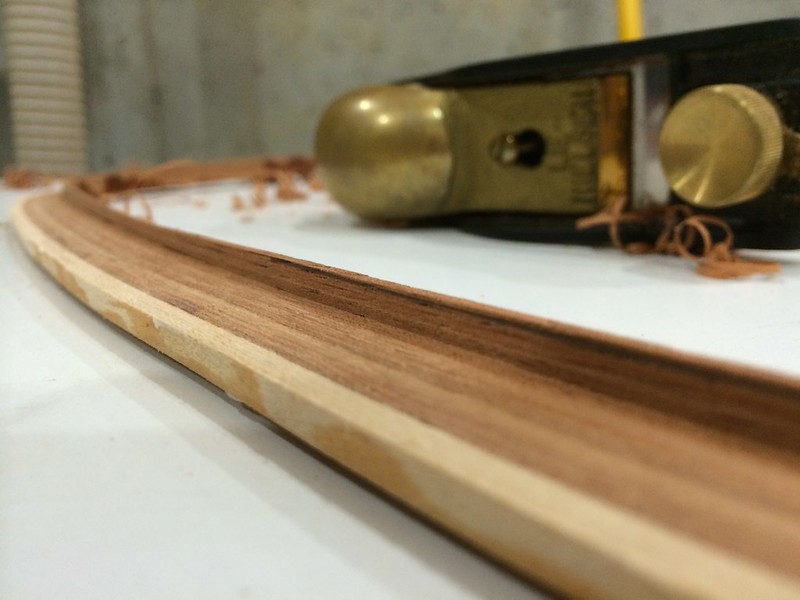
Used a sanding block to bevel the edge of the flange to receive the fillet.
Masked of the coaming rings to receive the fillet.
Fillet applied and tape removed.
While fillet is still wet both sides are clamped back to the riser so that they will dry while conforming to the shape of the recess.
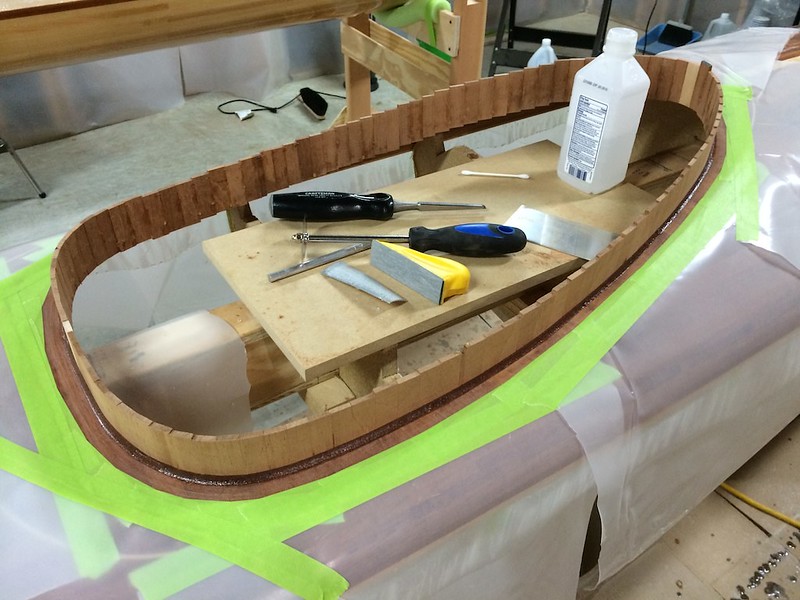
Today I'll remove the rings and glass the underside before permanently attaching them to the riser.
Greg
https://www.flickr.com/photos/91958255@N04/sets/72157635543653071/

Messages In This Thread
- Strip: Laminated coaming ring *PIC*
Greg Galloway -- 8/24/2014, 12:04 pm- Re: Strip: Laminated coaming ring
Etienne Muller -- 8/24/2014, 12:55 pm
- Re: Strip: Laminated coaming ring
